Create a Project
Now that you have the server running, you can setup a project to translate on the server.
Our assumptions
To simplify the example we assume that:
- The project uses PO files.
- You can copy these files to the Pootle server.
- There is a template file in POT format containing the strings that need to be translated.
- The project follows the GNU layout (More information on this is provided below).
- Pootle is correctly set up and running.
- There is at least one rqworker thread running. This is important.
- You are logged into the Pootle server using your newly created administrator user.
Adding a new project
Placing translation files
You need to place the translation files for your new project in a location
where Pootle can find, read and write them. Pootle uses the
POOTLE_TRANSLATION_DIRECTORY setting to find out where translation
files are stored on the server.
Our example project uses a GNU layout.
A GNU layout means that our project contains translation files named using language codes. Within the project there are no directories, just files. There can only be a single translation file per language in a project using this layout.
This is the simplest layout possible and the reason we are using it in our example.
Below you can see an example with two projects using the GNU layout:
`-- translations
    `-- project1
    |   |-- de.po
    |   |-- fr.po
    |   |-- gl.po
    |   |-- pt_BR.po
    |   `-- templates.pot
    `-- project2
        |-- af.po
        |-- eu.po
        |-- pt_BR.po
        |-- templates.pot
        `-- zu.po
Among the regular translation files there are two files named
templates.pot. These are the template (master or reference) files that
contain the original strings. Usually these files contain only English strings,
however it is much less confusing to use the term templates than e.g.
en or English.
To get started, create a my-project directory in the location pointed
to by POOTLE_TRANSLATION_DIRECTORY and place within it the
translation files for your new project. Make sure you have a
templates.pot among those project translation files.
Creating the project
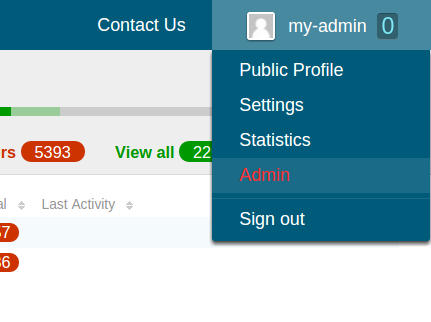
At the top of the user interface, you will see your newly created administrator username. Click on it and the main top menu will be displayed, then click on Admin (highlighted in red):
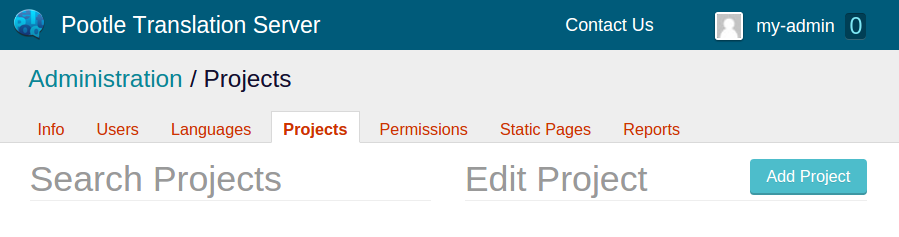
Now you are in the administration interface. Go to the Projects tab and you will see a New Project button:
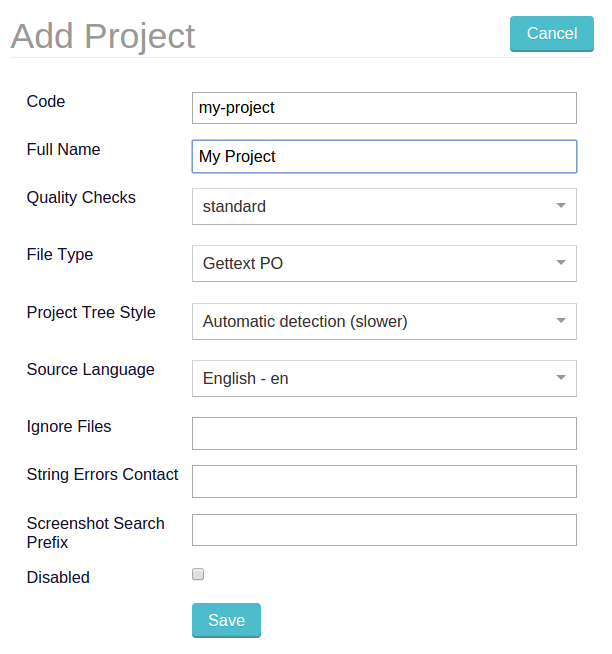
Click on that button and the Add Project form will be displayed. Enter the
new project’s details. Code must match the name of the directory within
POOTLE_TRANSLATION_DIRECTORY that contains the project translation
files, in our example my-project. Also you must specify the
File Types used in this new project, in our example
Gettext PO (po/pot).
You can also provide a Full Name easily readable for humans. You don’t need to change the rest of the fields unless you need to further customize your project.
Once you are done click on the Save button below the form to create the
project. Creating the project doesn’t actually import all the translations to
Pootle. To do that you need to run update_stores on the command line
of the Pootle server:
(env) $ pootle update_stores --project=my-project
This will import all the translations from disk into Pootle, calculate the translation statistics and calculate the quality check failures. This might take a while for a large project.
Looking at your new project you will see that Pootle has imported all the
existing translations for the existing languages that you copied to the
my-project directory within POOTLE_TRANSLATION_DIRECTORY.
Enable translation to a new language
When you want to add a new language to the project, follow these steps.
Go to your project overview and select Languages in the navigation dropdown:

Note
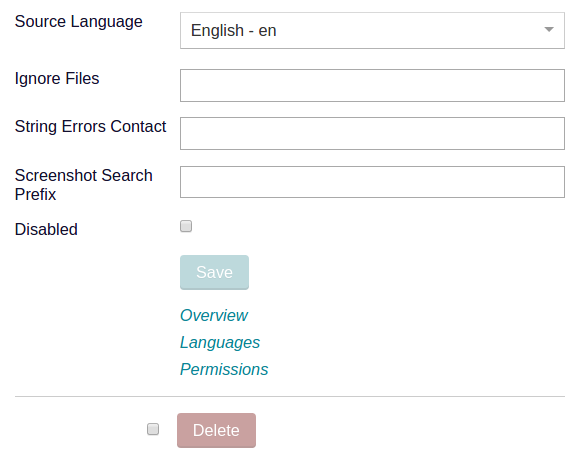
Alternatively you can get the same result by clicking on the Languages link that is displayed below your project form in the administration interface:
The existing languages enabled for the project are listed. In our example we are adding Arabic to the project:
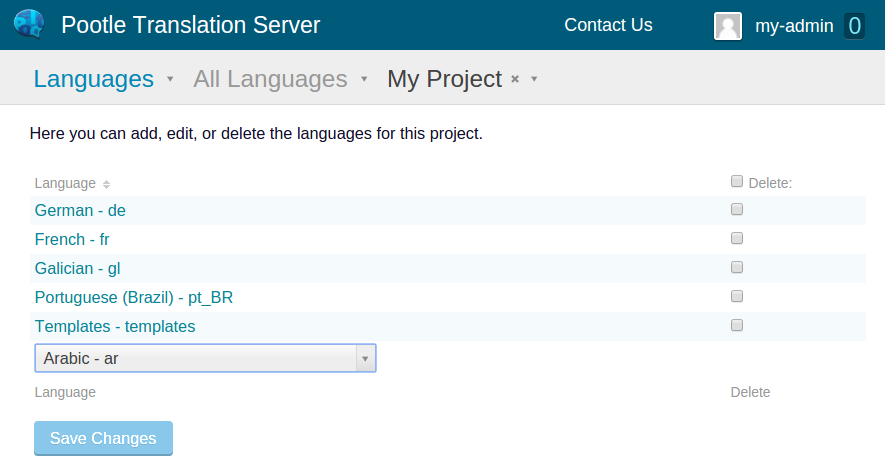
When you click the Save button the new language will be added for
translation. In large projects it may take some time to create the new
translation files from the templates.
Note
If you want to enable translation to a language that doesn’t yet exist in your Pootle instance, then you will first have to add the language in the Languages tab in the administration interface, in a similar way to creating a new project.
Once the language is created you can enable translation to that new language in any project by following the instructions above.
Updating strings for existing project
Whenever developers introduce new strings, deprecate older ones, or change some of them this impacts Pootle and the languages being translated.
When any of these changes occur, you will need to generate a new
templates.pot and use it to bring the translations in Pootle up-to-date
with the new templates.
Once you have created the new templates.pot place it within your
project’s directory in POOTLE_TRANSLATION_DIRECTORY, replacing the
file with the same name. After that, invoke the following command which will
update the template translations in the Pootle database.
(env) $ pootle update_stores --project=my-project --language=templates
This command will ensure that new strings are added to the project and any strings which have been removed are marked as deprecated, and thus will not be available for translation.
Now each of the languages will need to be brought into sync with the template language. The first step is to save all the Pootle translations to disk:
(env) $ pootle sync_stores --project=my-project
Then update all those translations on disk against the newer templates. We recommend you to update them on disk using the pot2po command line tool because it can handle other formats besides Gettext PO.
(env) $ cd $POOTLE_TRANSLATION_DIRECTORY  # Use the actual path!
(env) $ cd my-project
(env) $ pot2po -t af.po templates.pot af.po  # Repeat for each language by changing the language code.
Note
To preserve the existing translations we pass the previous
translation file to the -t option.
When all the languages in the project have been updated you can push them back to Pootle:
(env) $ pootle update_stores --project=my-project
Note
If your project languages contain many translations you might want to perform the update against newer templates on a language by language basis.